Free Software and Tools for CPU & GPU Cryptocurrency Mining

- Explore essential programs, drivers, BIOS files, and utilities for efficient cryptocurrency mining.
Mining Software & Tools for CPU and GPU


Mining software for different cryptocurrencies on both GPU and CPU. This section features popular miners such as PhoenixMiner, T-Rex, TeamRedMiner, XMRig, and others — available for Windows and Linux. Supported algorithms include Ethash, KawPow, RandomX, Autolykos, and more.

A collection of up-to-date GPU and chipset drivers optimized for mining. Includes stable releases for AMD, NVIDIA, and Intel hardware with full OpenCL and CUDA support. Proper drivers ensure maximum hash rate, stable operation, and compatibility with modern mining software.

Custom and stock BIOS firmware for graphics cards and motherboards used in mining rigs. Modified BIOS versions help boost hash rate, reduce power consumption, and improve overall stability. Backup and recovery tools are also available for safe flashing and configuration.
- Stay informed with the latest trends, software releases, and performance insights from the world of CPU and GPU cryptocurrency mining.

- News
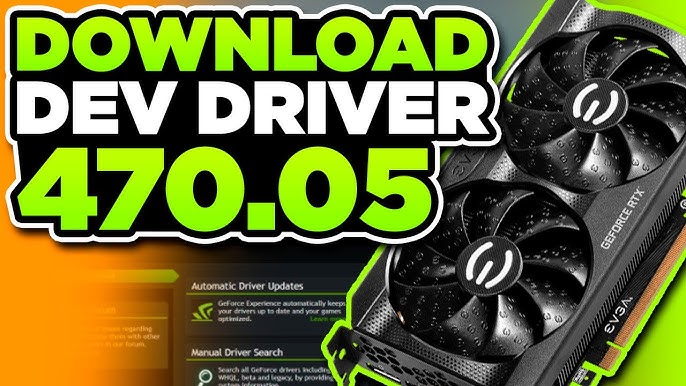
What is Beta Driver 470.05?
Beta Driver 470.05 is a cutting-edge software solution designed to optimize and streamline driver management workflows. This innovative tool enables users to efficiently build restore points, maintain encrypted repositories, and troubleshoot issues quickly. In this comprehensive guide, we will delve into the features, benefits, and technical specifications of Beta Driver 470.05, providing you with a thorough understanding of how to master this powerful software.
Main Features and Benefits
Beta Driver 470.05 boasts an array of features that make it an indispensable tool for driver management. Some of its key features include:
- Restore Point Creation: Easily create and manage restore points to ensure business continuity and minimize downtime.
- Encrypted Repositories: Store and manage driver files in secure, encrypted repositories to protect against unauthorized access.
- Fast Troubleshooting: Quickly identify and resolve driver-related issues with the software’s intuitive troubleshooting tools.
Installation Guide
System Requirements
Before installing Beta Driver 470.05, ensure your system meets the following requirements:
- Operating System: Windows 10 or later
- Processor: 2 GHz or faster
- Memory: 4 GB or more
- Storage: 1 GB or more available space
Installation Steps
Follow these steps to install Beta Driver 470.05:
- Download the installation package from the official website.
- Run the installer and follow the prompts to select the installation location.
- Accept the terms of the license agreement and click

- News
What is Beta Driver 470.05?
Beta Driver 470.05 is a cutting-edge driver program designed to optimize the performance of your computer’s hardware. As a beta version, it offers a sneak peek into the latest features and improvements that will be included in the final release. With Beta Driver 470.05, you can experience enhanced graphics, improved gaming performance, and increased overall system stability.
Main Features of Beta Driver 470.05
The Beta Driver 470.05 boasts an array of innovative features that set it apart from its predecessors. Some of the key features include:
- Multi-threading support for improved performance in multi-core processors
- Advanced power management for reduced energy consumption
- Enhanced graphics rendering for smoother gaming and video playback
- Improved compatibility with the latest operating systems and software applications
How Beta Driver 470.05 Works
Driver Installation and Configuration
Installing Beta Driver 470.05 is a straightforward process that requires minimal technical expertise. Simply download the driver package from the official website, run the installation wizard, and follow the on-screen instructions to complete the setup process.
Snapshot Routine Guide
One of the unique features of Beta Driver 470.05 is its snapshot routine capability. This feature allows you to create a snapshot of your system’s current state, including all installed drivers, applications, and settings. This snapshot can be used to restore your system to a previous state in case of any issues or conflicts.
Creating a Snapshot
To create a snapshot, follow these steps:
- Launch the Beta Driver 470.05 control panel
- Click on the

- News
What is Beta Driver 470.05?
Beta Driver 470.05 is a cutting-edge driver program designed to optimize and streamline your computer’s performance. This innovative software is packed with features that enable users to manage their drivers efficiently, ensuring that their system runs smoothly and securely. With Beta Driver 470.05, you can easily update, backup, and restore your drivers, giving you complete control over your computer’s functionality.
Main Features and Benefits
Beta Driver 470.05 boasts an impressive array of features that make it an indispensable tool for anyone looking to optimize their computer’s performance. Some of the key benefits of using Beta Driver 470.05 include:
- Effortless Driver Updates: With Beta Driver 470.05, you can easily update your drivers to the latest versions, ensuring that your system runs smoothly and efficiently.
- Comprehensive Backup and Restore: The program allows you to create backups of your drivers, which can be easily restored in case of a system failure or crash.
- Enhanced Security: Beta Driver 470.05 includes robust security features that protect your system from malware and other online threats.
Installation Guide
Step 1: Downloading Beta Driver 470.05
To get started with Beta Driver 470.05, you’ll need to download the program from the official website. Simply click on the download link, and the program will be saved to your computer.
Step 2: Installing Beta Driver 470.05
Once the download is complete, run the installation file and follow the on-screen instructions to install Beta Driver 470.05. The installation process is straightforward and should only take a few minutes to complete.
Step 3: Activating Beta Driver 470.05
After installation, you’ll need to activate Beta Driver 470.05 using the license key provided. This will unlock the program’s full features and enable you to start using it.
Technical Specifications
System Requirements
| Operating System | Windows 10, 8.1, 8, 7, Vista, XP |
|---|---|
| Processor | Intel Core 2 Duo or AMD equivalent |
| Memory | 2 GB RAM or more |
| Hard Disk Space | 100 MB or more |
Pros and Cons
Pros
- User-Friendly Interface: Beta Driver 470.05 features an intuitive interface that makes it easy to navigate and use, even for those with limited technical expertise.
- Comprehensive Driver Database: The program has an extensive database of drivers, ensuring that you can find and update the drivers you need.
- Robust Security Features: Beta Driver 470.05 includes advanced security features that protect your system from malware and other online threats.
Cons
- Resource Intensive: Beta Driver 470.05 can be resource-intensive, which may slow down your system if you have limited hardware resources.
- Steep Learning Curve: While the interface is user-friendly, some features may require technical knowledge to use effectively.
FAQ
Q: Is Beta Driver 470.05 compatible with my operating system?
A: Yes, Beta Driver 470.05 is compatible with Windows 10, 8.1, 8, 7, Vista, and XP.
Q: How do I update my drivers using Beta Driver 470.05?
A: To update your drivers, simply launch Beta Driver 470.05, click on the ‘Update’ button, and follow the on-screen instructions.
Q: Can I use Beta Driver 470.05 to backup my drivers?
A: Yes, Beta Driver 470.05 allows you to create backups of your drivers, which can be easily restored in case of a system failure or crash.

- News
What is Quick CPU?
Quick CPU is a utility software designed to help users monitor and manage their computer’s central processing unit (CPU) performance. It provides a range of features that enable users to optimize their CPU settings, adjust power management options, and troubleshoot issues related to CPU performance. With Quick CPU, users can take control of their computer’s CPU and ensure it runs at its best.
Main Features
Some of the key features of Quick CPU include:
- CPU monitoring: Quick CPU allows users to monitor their CPU’s current speed, voltage, and temperature.
- CPU performance optimization: The software provides options to adjust CPU performance settings, such as turbo boost and hyper-threading.
- Power management: Quick CPU enables users to adjust power management options, including CPU power saving modes and sleep states.
- Troubleshooting: The software includes tools for troubleshooting CPU-related issues, such as identifying overheating problems and detecting CPU-intensive processes.
Installation Guide
System Requirements
Before installing Quick CPU, ensure your system meets the following requirements:
- Operating System: Windows 10, 8.1, 8, 7, or Vista
- Processor: Intel or AMD CPU
- Memory: 2 GB RAM or more
- Hard Disk Space: 10 MB or more
Download and Installation
To download and install Quick CPU, follow these steps:
- Visit the Quick CPU website and click on the
- News
What is Beta Driver 470.05?
Beta Driver 470.05 is a cutting-edge software solution designed to optimize and manage driver performance on Windows-based systems. As a beta version, it offers a sneak peek into the latest features and improvements that will be included in future releases. This driver is specifically tailored to provide enhanced compatibility, stability, and performance for various hardware components, including graphics cards, sound cards, and network adapters.
Main Features and Benefits
Beta Driver 470.05 boasts an array of innovative features that set it apart from its predecessors. Some of the key highlights include:
- Improved compatibility with the latest hardware devices
- Enhanced performance and stability for demanding applications
- Streamlined installation process with automated driver detection
- Advanced troubleshooting tools for resolving common issues
How Beta Driver 470.05 Works
Driver Management and Optimization
Beta Driver 470.05 utilizes a sophisticated algorithm to scan and detect outdated, missing, or corrupted drivers on the system. It then proceeds to download and install the latest versions, ensuring that all hardware components are running at optimal levels.
Snapshot and Restore Points
The software also creates snapshots and restore points, allowing users to easily revert to a previous driver configuration in case of compatibility issues or system crashes.
Installation Guide
Step 1: Download and Launch the Installer
To install Beta Driver 470.05, simply download the installer from the official website and launch it on your Windows-based system.
Step 2: Follow the Installation Wizard
Follow the prompts and instructions provided by the installation wizard to complete the setup process. This may include accepting the terms and conditions, selecting the installation location, and choosing the desired driver components.
Technical Specifications
System Requirements
Beta Driver 470.05 is compatible with the following Windows operating systems:
- Windows 10 (64-bit)
- Windows 8.1 (64-bit)
- Windows 7 (64-bit)
Hardware Requirements
The software requires a minimum of 2 GB RAM and 500 MB free disk space to function optimally.
Pros and Cons
Advantages
Beta Driver 470.05 offers several benefits, including:
- Improved system performance and stability
- Enhanced compatibility with the latest hardware devices
- Streamlined driver management and optimization
Disadvantages
Some potential drawbacks of using Beta Driver 470.05 include:
- Possible compatibility issues with certain hardware components
- May require manual configuration for advanced features
FAQ
Frequently Asked Questions
Q: Is Beta Driver 470.05 free to download and use?
A: Yes, the software is available for free download and use.
Q: Can I use Beta Driver 470.05 on Mac or Linux systems?
A: No, the software is currently only compatible with Windows-based systems.
Q: How do I uninstall Beta Driver 470.05?
A: You can uninstall the software using the standard Windows uninstallation process.

- News
What is 50Miner?
50Miner is a popular mining software designed to help users optimize their mining operations and increase their cryptocurrency earnings. With its advanced features and user-friendly interface, 50Miner has become a go-to solution for many miners. In this article, we will delve into the world of 50Miner, exploring its key features, installation guide, technical specifications, pros and cons, and frequently asked questions.
Main Features of 50Miner
50Miner offers a range of features that make it an attractive option for miners. Some of its main features include:
- Multi-algorithm support: 50Miner supports a wide range of mining algorithms, including SHA-256, Scrypt, and Ethash.
- High-performance mining: 50Miner is optimized for high-performance mining, allowing users to maximize their mining power.
- User-friendly interface: 50Miner features a user-friendly interface that makes it easy to navigate and use, even for beginners.
- Remote monitoring: 50Miner allows users to monitor their mining operations remotely, making it easy to keep track of their progress.
Installation Guide
System Requirements
Before installing 50Miner, make sure your system meets the following requirements:
- Operating System: Windows 10 or later, macOS High Sierra or later, or Linux Ubuntu 18.04 or later.
- Processor: 64-bit processor with at least 4 cores.
- Memory: 8 GB or more of RAM.
- Storage: 10 GB or more of free disk space.
Installation Steps
To install 50Miner, follow these steps:
- Download the 50Miner software from the official website.
- Extract the downloaded file to a folder on your computer.
- Run the 50Miner.exe file and follow the installation prompts.
- Once installed, launch 50Miner and follow the setup wizard to configure your mining settings.
Technical Specifications
Hardware Compatibility
50Miner is compatible with a wide range of mining hardware, including:
- NVIDIA GeForce graphics cards.
- AMD Radeon graphics cards.
- ASIC miners from manufacturers such as Antminer and Whatsminer.
Software Requirements
50Miner requires the following software to be installed:
- .NET Framework 4.6.2 or later.
- OpenCL 1.2 or later.
Pros and Cons
Pros
Some of the advantages of using 50Miner include:
- High-performance mining: 50Miner is optimized for high-performance mining, making it a great option for users looking to maximize their mining power.
- User-friendly interface: 50Miner features a user-friendly interface that makes it easy to navigate and use, even for beginners.
- Multi-algorithm support: 50Miner supports a wide range of mining algorithms, making it a versatile option for users.
Cons
Some of the disadvantages of using 50Miner include:
- Resource-intensive: 50Miner can be resource-intensive, requiring a powerful computer to run smoothly.
- Steep learning curve: While 50Miner is user-friendly, it can still be overwhelming for beginners, especially those new to mining.
FAQ
How do I download 50Miner for free?
50Miner is available for download from the official website. Simply click on the download link and follow the installation prompts.
How does 50Miner compare to alternatives?
50Miner is a popular mining software that competes with other solutions such as CGMiner and EasyMiner. While each software has its own strengths and weaknesses, 50Miner is known for its high-performance mining and user-friendly interface.
What are the system requirements for 50Miner?
The system requirements for 50Miner include a 64-bit processor with at least 4 cores, 8 GB or more of RAM, and 10 GB or more of free disk space.